Showing posts with label farm wife. Show all posts

Monday, December 19, 2011

dark days of winter, meal 3: Southern Q

this week's post is horrifyingly low on decent pictures, due to distractions in the form of friends showing up to meet the new dawg and staying for dinner. in lieu of a plate shot, i give you ginger, our new puppy:

ginger is growing fast!

now, on to business.

this week's meal is all southern, and very old school, with the exception of the fact that i used my crock pot to make BBQ instead of digging a hole in my back yard to smoke it.

on the menu

  • pulled pork BBQ
  • old school braised greens with indian dumplings
  • honey glazed roasted carrots
  • sweet josie brown ale from lonerider brewery
    (there's a keg of this local brew in my garage--i thought i'd feature it along with the food.)
local ingredients
* purchased at western wake farmers market

non-local ingredients
  • salt
  • red pepper rib rub made by my friend karen
  • apple cider vinegar
  • liquid hickory smoke (real, not chemical--cause, ew)
semi-local ingredients
  • bone-suckin' sauce - made in north carolina, but i have zero clue from whence the ingredients come. it's as local as i can get BBQ sauce without making my own, which is a challenge in the winter.
  • bacon fat - from holland brothers bacon, not local to us, but local to the grandparents who live in PA. bacon from this place is a yearly gift from our family, and it's awesome.

easy
: as always, meat and produce are the no-brainers.

challenging: the semi-local ingredients here are my compromise. things like apple cider vinegar, liquid smoke, and salt i KNOW i can't get locally, but the other things? well--i guess i am just trying to keep the carbon footprint as low as possible on things like that. it doesn't make sense to me to buy bacon that's local to me, when i already have bacon that was a gift from someone for whom that bacon IS local. does that make sense?

recipes

dark days meal 3, pulled pork

pulled pork, crock pot style (made up on the fly):
ingredients:
boston butt or pork shoulder roast
your favorite rib rub
1/4 cup apple cider vinegar
20 or so drops of real liquid smoke
BBQ sauce

directions:
cover pork roast liberally with spice rub, and put into your crock pot. add apple cider vinegar. cook on low for 8 hours. remove pork and pull from bone with 2 forks or tongs. drain off most of liquid (reserve for soup stock or beans--trust me--keep that stuff). (note: if you are going to make the greens below, reserve a couple of ounces of meat at this stage.) return the pork to the crock pot. add a little of the cooking liquid, maybe 1/4 a cup. add the liquid smoke, and about 1/3 a cup of BBQ sauce. mix well, and cook another hour on low to mix flavors and caramelize the meat. serve with more sauce or on buns or you know--however you like to eat BBQ.

dark days meal 3, honey glazed carrots

honey glazed roasted carrots (made up on the fly)
ingredients:
carrots
~2 tablespoons butter
~2 tablespoons honey

directions: preheat oven to 425 degrees (F). peel carrots and cut into sticks. put into a baking dish with some butter. roast for 8 minutes, then stir. roast for 8 more minutes. add honey and stir in. roast for 16 more minutes, stirring one more time half way through. carrots should be starting to caramelize when they are done. best use of fresh carrots in the world!

dark days meal 3, greens and dumplings

braised greens with indian dumplings (adapted from bill neal's southern cooking)
ingredients:
2.5 to 3 lbs cooking greens (collards, kale, chard, etc.)
8 cups water
~4 tablespoons bacon fat
1 teaspoon salt
2 oz pork meat or a small ham hock
1/2 teaspoon red pepper flakes
1 cup cornmeal
1.5 tablespoons butter or bacon fat or lard

directions:
in a large stockpot or braising pot, add water, bacon fat, salt, finely chopped pork, and red pepper flakes. bring to a boil, then boil on medium-high heat for about 20 minutes. add the greens, cover tightly. return to a boil, stir down the greens, and then simmer, covered, for about 50 minutes if you are going to add indian dumplings, or an hour if you're not.

for the dumplings, place cornmeal into a small mixing bowl. steal 1/2 cup of boiling liquid from the greens, and slowly work it into the cornmeal with the back of a wooden spoon. work fat in with your fingers while the cornmeal mix is still warm. shape into small biscuit-like disks, about an inch wide and 1/2 an inch thick--it should make 16-18 of these. when the greens have been cooking for about 50 minutes, give them a final stir, then lay the dumplings on top to cook. let them cook for about 10 minutes, and voila, you have delicious little dumplings in your greens.

note: indian dumplings are like a cross between hushpuppies and gnocci. this was the first time i'd made them, but they were surprisingly easy and fast--i will most certainly make them again. i can imagine they would be delightful with soups and stews as well as in greens.

note the second: after you serve the greens, you will have quite a bit of liquid left. if you combine it with the reserved liquid from the pork, you have an EXCELLENT soup base on your hands. i generally throw this in the fridge overnight, so i can skim the fat off easily in the morning. then i put it in the freezer to use whenever. i recommend this as a base for my white bean and kale soup.

dark days meal 3, ready to eat

family ruling
everyone at our house loves all this, and the friends we spontaneously had over for dinner last night agree. the 11-year old had 2 helpings of the greens, so--win.

further thoughts
southern cooking is my kitchen comfort zone, as it turns out. i feel more free with recipes and restrictions in this area than any other, and since i live in the south, it makes sense that these are the ingredients that are easiest for me to get locally. i am guessing you will see more southern food from me before this is challenge is done. meal #3 i am calling a resounding success. yay for BBQ!

Monday, December 12, 2011

dark days of winter, meal 2: dinner with a friend

this week, i ended up cooking a last minute dinner for a good friend who came into town unexpectedly. this means i had less time to think about what to make, and had to rely on what i already had in the house. as a result, this week's meal has more non-local ingredients than last week's, but i am happy with how much of it IS local, with very little effort!

dark days meal 2, plated


on the menu

  • chicken and 40 cloves
  • whipped sweet potatoes with ginger
  • salad
  • rosemary olive oil bread

dark days meal 2, local ingredients

local ingredients
  • whole chicken from fickle creek farm (efland, nc, 44 miles)*
  • thyme from our yard (apex, nc, 15 feet)
  • butter from homeland creamery (julian, nc, 57 miles)
  • honey from our family's bees (20 miles)
  • sweet potatoes from ben's produce (clayton, nc, 33 miles)*
  • fresh ginger from redbud farm (burlington, nc, 62 miles)*
  • milk from maple view farm (hillsborough, nc, 34 miles)
  • french breakfast radishes from ben's produce (clayton, nc, 33 miles)*
  • lettuces from screech owl greenhouse (moncure, nc, 19 miles)*
  • cucumber from screech owl greenhouse (moncure, nc, 19 miles)*
* purchased at western wake farmers market

dark days meal 2, non-local ingredients

non-local ingredients
  • salt
  • pepper
  • olive oil (organic)
  • celery (organic)
  • grape tomatoes (organic)
  • garlic
  • red bell pepper (organic)
  • cinnamon
  • rosemary olive oil bread (not pictured) (baked locally, but sourced from ???)
easy:
as always, the meat and produce is mostly easy for me to get locally. everything you see here i already had in my house with no planning at all.

challenging:
this week i was traveling and very busy, so there was not as much time to plan my meal. as a result, this one is mostly local--all the spotlight parts are local. but it still feels a little cheater-y to me. this is especially true for the non-local salad produce, the bread we had with dinner, which was a last minute purchase, and the salad dressing, which was whatever we had in the fridge. i didn't even think about dressing until dinner was made and on the table.

recipes

chicken and 40 cloves:
this is a tried and true recipe from alton brown. it's posted on the food network website, so i think posting it again here might be a copyright violation. you guys know how to click a link though, right? go make this right now! it's awesome!

whipped sweet potatoes with ginger (made up on the fly)
ingredients:
9-10 small sweet potatoes
~2 tablespoons butter
3-4 tablespoons honey
~1.5 tablespoons chopped gresh ginger
(note, i used uncured, super-fresh ginger from a local supplier, and NOT the ginger from the grocery store, which is much stronger. if you use that, i'd recommend cutting this amount in half.)
1/2 teaspoon cinnamon
milk to texture (added gradually while whipping)

directions:
preheat oven to 450. bake sweet potatoes for ~40 minutes until soft, piercing with a fork after 20 minutes. remove skins and place in a large bowl. add butter, honey, ginger, cinnamon, and about 1/4 cup of milk, and mash with a potato masher until well mixed. then, using a hand mixer, beat until fluffy. add milk if necessary to obtain the right texture/moisture.

salad
um--i can't say i have a recipe for a salad. i just put everything i can find in the fridge that looks like it would be good in a salad. this one contained mixed lettuces, celery, radishes, red pepper, grape tomatoes, and cucumber.


dark days meal 2, ready to eat

family ruling
everything was awesome, especially the sweet potatoes. my friend who was visiting seemed stunned that this is what i ended up with when i just threw something together, so that's a good ruling as well--he ate everything with gusto.

further thoughts
cooking on weeknights is a challenge for me. i work full time and have two small (hungry) children in daycare. i have to leave work, get them, drive home in a boatload of traffic, and THEN address dinner. i get around this most of the time by planning ahead and cooking and prepping as much as i can ahead of time. some weeks it's great--others, it falls apart on me. this past week, i had the added travel stress on the table, and then my friend showed up out of nowhere--this was literally the best i could pull off. i am not as proud of this as i was of my sunday brunch last week, but then i didn't have the time for the same level of planning and thought as i did for that meal. i will say this, however: i am very proud of my pantry and my freezer for getting me this close to an all local meal absolutely on the fly.

Tuesday, June 21, 2011

robbing the bees, part two

note: this is part two of a two part post on my family's honey harvest. click here for part one. also, if you want to skip the words, and just check out the pictures, you can find them all here: honey harvest, a set on flickr.

centrifuge
centrifuge brand - old school
spinning the honey
inside the centrifuge
empty frame

spinning the honey

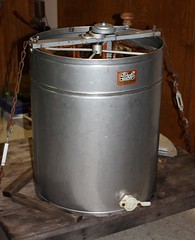
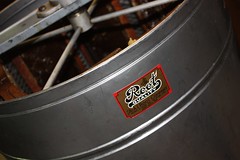
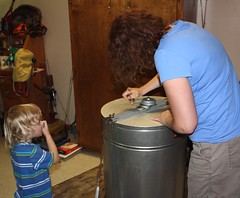
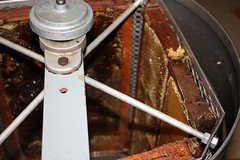
once the wax caps have been cut away so that the honey is exposed in the honeycomb, you load 8 frames into an extractor and spin the honey out. the extractor is basically a centrifuge, and i have learned that there are two kinds, radial and tangential. the one here is tangential, which means that we have to spin the frames twice: there is a solid layer of wax in the center of each frame, so you have spin in one direction, then flip the frames over and spin the honey out the other way as well. with a radial extractor, you can extract both sides at once because of the way the frames are positioned in the centrifuge. in both cases, as you spin the extractor, honey is forced to the outside of the cylinder and then runs down to the bottom, where it collects until you are ready to drain it. this is harder than it looks, just from a control standpoint. note that in the pictures, you can see that dan chained the whole thing down to a heavy wooden stand so that nothing could get too out of control. each of the frames isn't all that heavy on its own, but you add 8 of them, full and dripping, and your load not without some inertial mass. you have to lean down on the top of the apparatus as you crank it, or it will go flying out of your hands. and then slowing it down when you want it to stop is an act of brute strength--i am pretty sure i came a hairs breadth of letting that thing fly across the room at one point. it's worth mentioning that you can also go too slowly or too quickly as well. you want to go fast enough to extract the honey without getting TOO fast and accidentally collapsing the honeycomb in the frame. kieran and finn were fascinated by the extractor. it's loud and whirring, and produces a lot of wind if you open the lid during the spinning process. and believe me, when the bottom of the tank starts to fill up, you KNOW when it's time to stop--the thick honey will hit the bottom of the centrifuge itself, and it's suddenly like trying to stir a brick. when the honey is out of the frames, they are light, and the comb cells are empty. some people will cut the comb and include it in jars of honey, but i really don't see the point of that. unless you have a use for the beeswax, i'd say just let the bees have it back.


problem frame
cells with pollen
bee pollen

bee pollen (aka, problem frames)

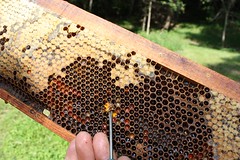
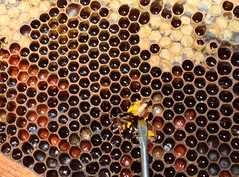
once in a while, you come across a frame that's a big pain in the butt to deal with. this one has a mix of half-filled cells, capped honey cells, and bee pollen. the pollen is the real issue--you don't want to spin that pollen out into your honey because you will NEVER get it back out again. dan taught me how to look at the frame and tell which cells are good and which are not. i thought it was odd that the bees cap the pollen cells just like the honey cells. so the trick becomes uncapping the honey cells without opening the pollen cells. then you can spin the frame just like the others to get what honey there is without getting pollen into the mix. it should also be noted that this is the bee pollen you can buy as a dietary supplement--some people believe that it's beneficial for all kinds of things ranging from improving memory, helping with weight loss, increasing sexual performance, to preventing hay fever. there's actually some evidence to support the use of local pollens to help with allergies, although from what i have read, ingesting them can also CAUSE sever allergic reactions in some people. i think most of these claims are probably marketing hokum, but what do i know, right? if i ever decide i need any, i clearly have a good source for it right here. :)


straining the honey
big pot of honey
clean jars
pouring

straining and pouring

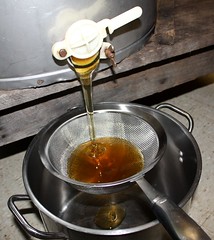
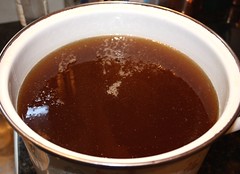
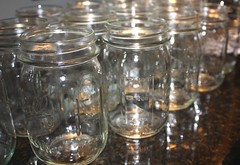
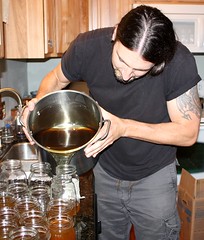
as you extract the honey, you periodically have to empty the tank. since we had many hands, we just ran the honey through a fine mesh strainer into big stock pots, then took it upstairs to pour into clean jars. this process is slow, but not difficult. if we were doing this as a commercial operation, we would probably have gone through more than one straining of the honey to make sure we got all of the impurities out. however, since our honey is for--well--us, we strained it once and called it good. i would say about 99% of all the stuff was out after that first straining anyway. it's actually pretty amazing how clean and clear it is straight out of the hive. after the straining, the pot of (freakin' heavy!) honey is carried up to where the jars await. these are just basic mason jars, for which i have some kind of i-was-a-farm-wife-in-a-previous-life kind of love. why do i think they are so pretty?! the pouring is straightforward, if a tad messy. i am honestly not strong enough to do it with a full stockpot of honey, so i enlisted help from the hippie. check out those guns. heh. i thought it was cute how he tucked in his hair to keep it from getting into the honey. this strategy, while seemingly sound, did NOT keep the honey from getting into the hair by the end of the day.


jars of honey
a LOT of honey

a LOT of honey!

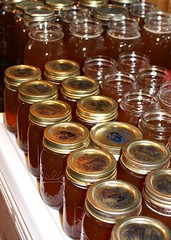
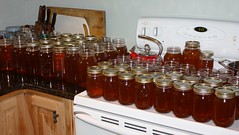
in the end, we harvested over 12 gallons of honey, which is a TON if you ask me! keep in mind that this is only a portion of the harvest, and only from two of the four hives. we will harvest again in the fall, but at that point, we will not take as much from each hive since winter will be coming, and the bees will need honey for themselves. i am really interested to see how the summer harvest is different from the spring one. even this time, there was a marked difference between the early spring honey, which was very light and clear, and the later honey--you could tell that dan and denise's neighbors had put in a buckwheat field in the late spring because the honey suddenly became much darker. we didn't try to separate the honey, but rather chose to blend it all together. however, i've talked to people who do this professionally, and they will rent little plots of land on which ti place bees on farms where specific crops are growing just to get different varieties of honey. i had some cotton honey once that was almost clear and so sweet it hurt my teeth, and then i've had buckwheat honey that's as dark as molasses and has a nuttier flavor. the honey is as different as the crops themselves.


pot of capping wax and honey
capping wax detail

finishing up

last, but not least, you have to harvest the capping wax and honey. this is done with heat--you collect it all in a pot, and slowly heat it till the beeswax melts. this causes the wax to come to the top, with the dirt, debris, and impurities in a layer under the wax, and then the honey on the bottom. from this amount of wax, dan said we should get another gallon or so of honey. and this honey, we WILL keep separate since it's been heated, which changes its character.


to wrap up, here are the answers to the questions everyone has been asking me since harvest day:
1. no, raw honey hasn't been heated in any way at all. it will crystallize more quickly than honey that's been heated, and if this happens, you can return it to nearly its original state by heating it very slightly. however, you don't want it to go over about 120 - 130 degrees F or you will start breaking down the sugars.

2. no you do NOT need or want to store honey in the fridge. it really doesn't go bad that i've ever seen or heard of. just keep it in your pantry. (or if you're like me, put it in something pretty because you are going to keep getting it out and leaving it on the counter so you can look at it.)

3. do NOT give honey to a baby under a year old. the sugars in honey are more complex than their little digestive systems can handle, and giving it to them can make them very sick. in fact, my grandmother used to say not to give it to a baby under 3 years old--the american academy of pediatrics now says one.
after all this, i guess it's safe to say that i am even more of a honey evangelist than i used to be. it just has to be one of the coolest processes in nature. i'm grateful to dan for teaching me so much about it, and i am really hoping he will let me help with the bees in the fall when we get ready to harvest again. if so, there may be a part three. we'll see!

Monday, June 20, 2011

robbing the bees, part one

i love honey. i think it's beautiful and tasty and healthy, and i love trying all different kinds. i like cooking with it (especially pumpkin pie!), i like it on toast with butter, it soothes my throat when it's sore, it's good in peanut sauce and salad dressing, and i have this idea that at some point i will have time to make things like facial masks and stuff out of it as well. i love how it smells and how it tastes. i've read books on its history, taken pictures of it, and eaten it by the spoonful. there are probably 15 kinds of honey in my cabinet right this minute. so when my pseudo-father-in-law, dan, asked me if i wanted to help him harvest the honey from his hives, i jumped at the chance. and folks, that was one awesome, educational, hard-working day! prepare to be bombarded with pictures, and more information than you ever wanted about honey! (by the way, i think i am going to break this up into two posts--there are too many pictures and too much information for one.)

note: if you want to skip the words, and just check out the pictures, you can find them all here: honey harvest, a set on flickr.


dan's four hives
hive
the bees' view

the hives

dan has 4 hives, all lined up in a perfect, shady clearing well away from the house or anything that would disturb the bees. the two in the middle are parent hives, and the two on the edges are child hives. this means that he's using the first two colonies to set up two new colonies in the smaller hives. the parent hives are normally much taller, but dan had already pulled out the boxes we were going to harvest when i got there. as the colonies grow, the hives will as well, but you start the child hives small and with the hive entrance facing in the opposite direction from the parent hives. if you look closely at the middle picture, you can see the bees coming in and out of the entrance on the bottom level of the hive. there's a stump in the middle of the clearing that's hollowed out and filled with water for them to drink. the bottom picture is the view of the top of the clearing, and when you stand there, you can see the bees zooming in and out of the clearing like tiny dive-bombers.


supers
super with frames
full frame with the caps on

the stucture of supers

each hive consists of a stack of wooden boxes called supers, and each super contains 10 frames, which are wooden frames in which the bees build honeycomb that gets filled with everything bees need: eggs and larvae, pollen, and eventually, honey. when you pull the supers, you suit up in protective gear, smoke the bees to calm them, pull the boxes out, inspect them to make sure they are not brood chambers (ie, filled with eggs, larvae, baby bees, etc.), brush off the bees with a paintbrush, and take 'em into the house--all before the bees get wise to your game and come after you. this is the part i didn't get to help with, about which i was both relieved and sad. honestly, i don't know if i could lift a full super--they are pretty heavy even without a full load of honey! the bees have spent all spring gathering pollen, turning it into honey, which they put into the combs in the frames, and capping the honeycomb cells with wax as each one was filled. the picture on the bottom of this set is a full frame, and the white/yellow coating you see are the beeswax caps on the honeycomb cells.


dan removing the caps
removing the caps
capping wax
full frame, caps off

processing the frames

so, to get the honey out of the frames, we must first remove the caps. dan has this special knife for cutting them off--it's an electric knife shaped like a flat sword that heats up so that it melts the wax enough to cut through it. this process is straightforward but a little tricky. you stand the frame up and hold it with one had, while skimming off the caps with the other. you want to cut deeply enough to open the comb without gouging the it, lest you a) lose too much honey, and b) damage the comb, which will be returned to the bees after the harvest is complete. some people take the comb for the wax, but dan lets the bees have it back so that they spend less time building new comb and more time making honey. makes sense to me. the pointed sword edge of the knife is essential for getting the caps off in the corners. it's also worth noting that this knife is HOT, which means the honey that does come out of the comb at this stage is also HOT, and hot honey is more than a little bit like napalm. there's quite a risk of burning here. i cut a couple of the frames, but dan did most of them, as he's about 14 times faster than me. he makes it look easy and simple, but trust me--it's not. as you cut the caps, you just let them fall into a pan to deal with later. they can be used for any number of things of course, primarily candles and seeding new frames for new bees. the bottom picture is what a very full freshly capped frame looks like. that one is now ready for processing.


next up, spinning, straining, and pouring!